Most people see a finished leather bag and judge it by its appearance alone.
What they don’t see is the time, precision, and decision-making that goes into every stage of the process. And that’s where the real value lies.
Mass-produced bags often miss that level of detail, which is why they tend to wear out, lose shape, or simply feel generic over time. A custom handmade leather bag is different because every step is intentional, built around both durability and the person it’s made for.
At Hidden Hides, each bag begins with raw full-grain leather and evolves through a hands-on process shaped by craftsmanship and customer input. This is a step-by-step look at how that transformation happens.
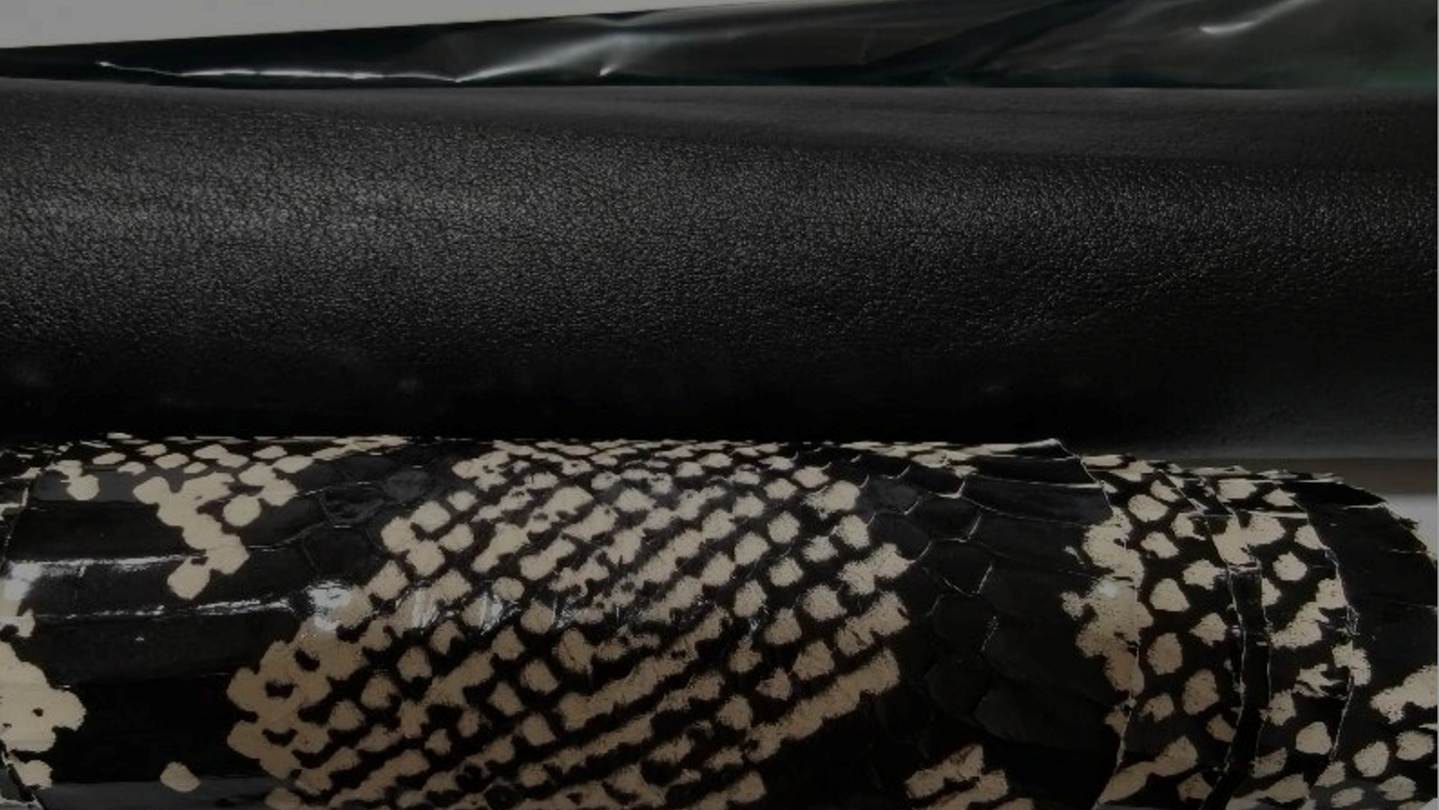
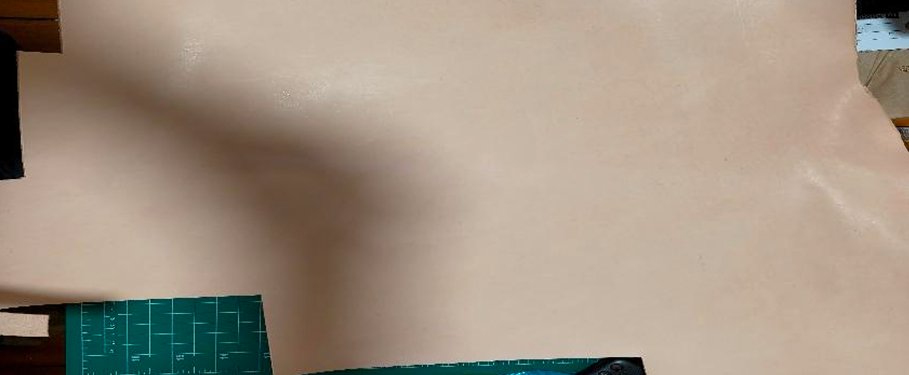
Step #1 Preparing the Full Grain Leather
The first cut is always the most important. I’m about to start work on a new custom commission using this 1mm full-grain cowhide. I’ve laid up the hide and it’s ready for the knife—this is where the journey begins. I chose this specific leather for its balance of durability and long-term structure, ensuring the bag ages beautifully with every year of use.
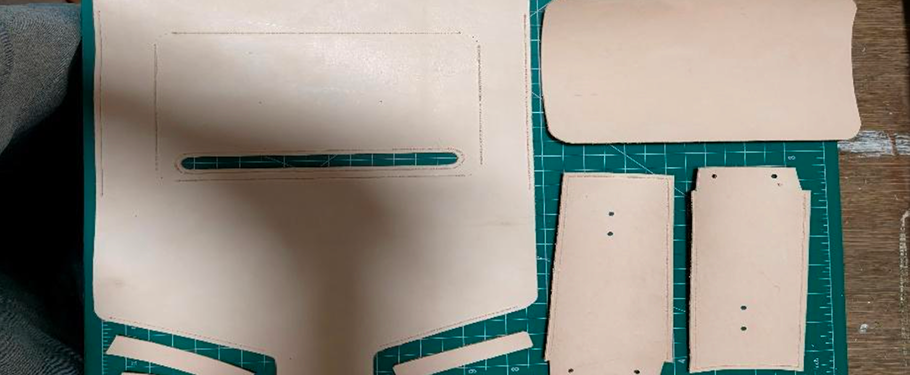
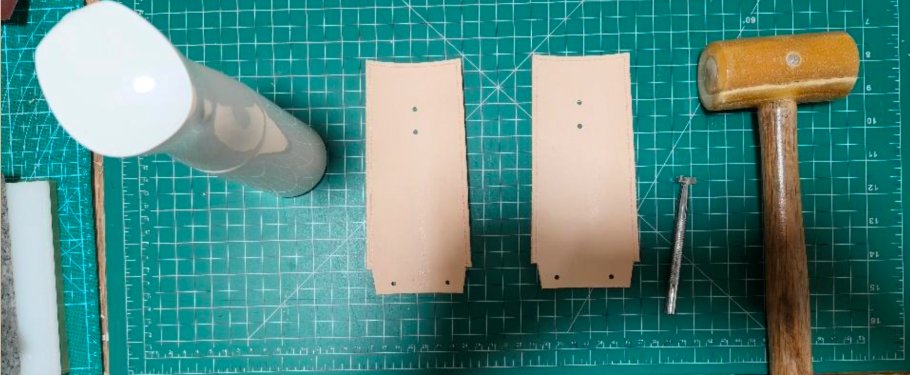
Step #2 Cutting, Shaping, and Preparing for Assembly
All pieces have been cut for the modified bag body, incorporating a flap to accommodate the second pocket at the rear of the bag. I then punched the majority of the holes and grooved the leather for hand stitching.
Once that was done, I bevelled the edges and prepared them for burnishing. This stage involves extensive background work, forming the foundation of the leather bag-making process before full assembly begins.
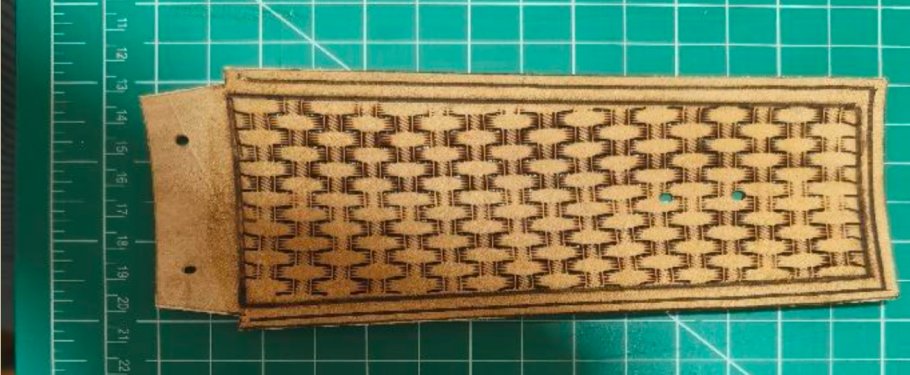
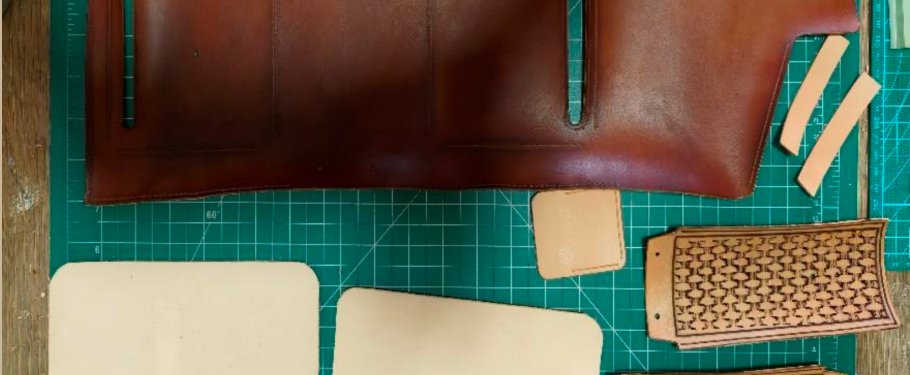
Step #3 Crafting the Gussets with Basketweave Detailing
The next step was to work on the bag’s gussets and attach them to the main body. I used a water sprayer, stamp, and rawhide mallet to run a basketweave pattern through the gussets. As you will notice, there is a clear difference between the stamped gusset and the natural leather, showing how the texture develops through handmade leather craftsmanship.
Step #4 Refining the Finish and Applying Toner
In these stages, the gussets transform from stamped leather into a more refined finish, giving the impression that they have been completely woven. To highlight the overall effect, I applied a brown toner, which adds depth and enhances the bag’s visual character.
Step #5 Dyeing and Sealing the Leather
Once the toner had dried, I moved on to dyeing and sealing all the parts that required it. The main body was dyed in a light brown with a saddle tan mix, while the other bag pieces were left natural and finished with a BagKote sealer. This step ensures the leather remains protected while allowing it to develop its character over time.
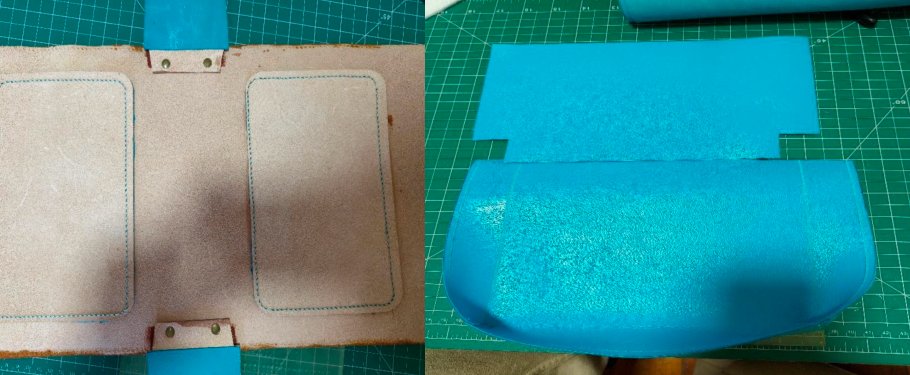
Step #6 Adding the Interior Lining
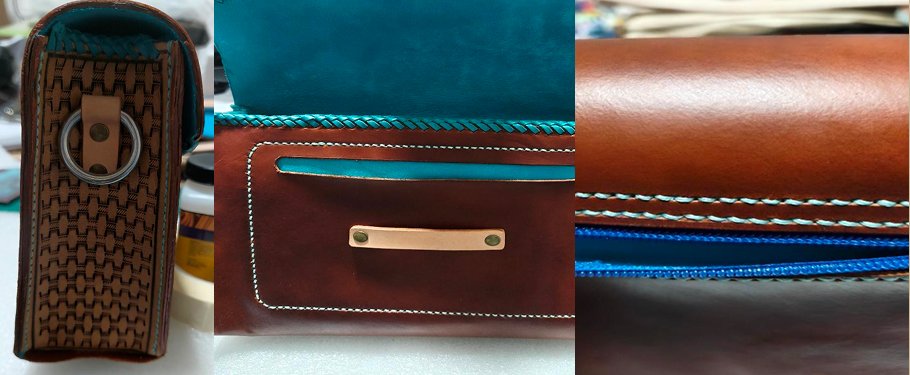
Now comes the bag lining, which was requested in a turquoise goat skin. I used an antique brass rivet to attach the parts as a secondary support alongside the stitching for the final assembly. The interior of a custom leather bag plays an important role in both structure and overall feel.
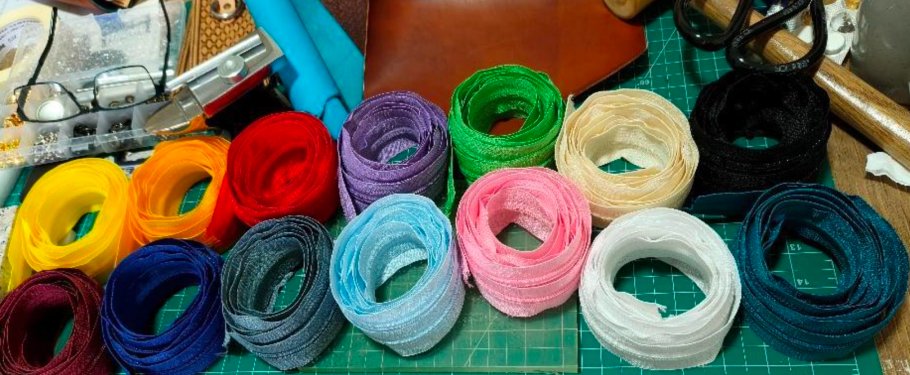
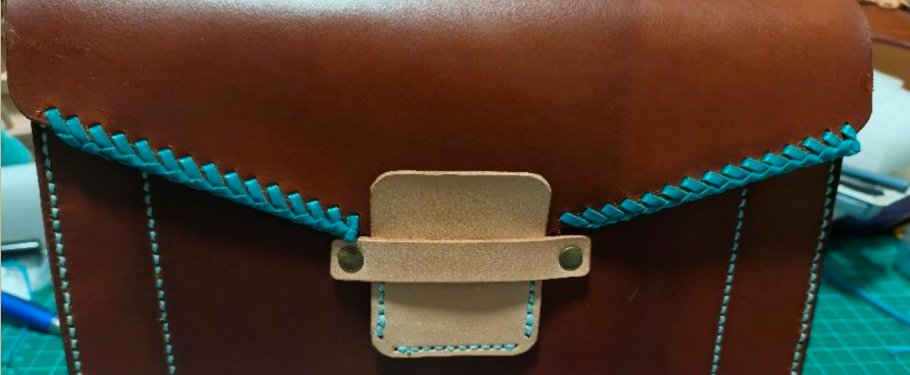
Step #7 Personalising Colours and Assembly
The final approval involved selecting the zippers’ colour. The customer chose lilac and dark blue and mentioned they also liked light blue. I opted to use lilac for the internal zipper and dark blue for the exterior. To tie everything together, I used light blue thread for the hand stitching, which worked well to highlight their personal style. At this stage, I lined the pockets, attached the zipper and flap keeper, then stitched the pocket in before attaching and lining the gusset.
Step #8 Designing the Internal Pocket
As you can notice, this is where the more complex part begins. I had to custom-design an internal pocket and lining for the bag, both made of goat skin. This part of the process focuses on both functionality and maintaining consistency with the overall design.
Step #9 Attaching the Pocket and Final Interior Work
I used two pieces of goat skin for the pocket to ensure the same soft, warm feel inside the pocket as the rest of the bag lining. The zipper was captured by the second layer, and the light blue stitching tied in well with the turquoise. The pocket was first held in place with glue and then hand-stitched to ensure strength and longevity.
At this point, the overall thought process behind the bag becomes clear. The lining was intentionally left until later stages to hide the stitching and rivets, resulting in a cleaner, more refined finish. As the final assembly comes together, the internal pocket fits seamlessly into the design.
Step #10 Final Assembly and Hand Finishing
The bag body is now nearly complete. All joints were hand-stitched, and once the structure came together, I decided to add lacing to enhance the overall finish. Turquoise kangaroo lacing was used to give the bag a distinct and polished look, adding another layer of handcrafted detail.
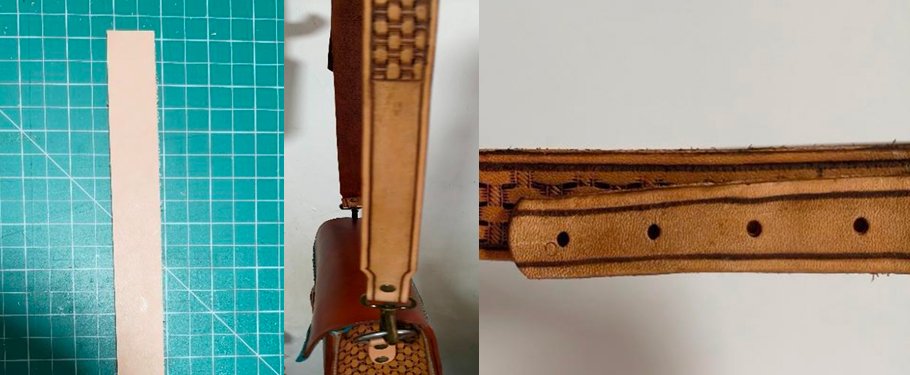
Step #11 Crafting the Matching Leather Strap
For the final step, I created a matching leather strap. The ends were recessed to add a subtle western-style look, and both parts of the strap were stamped with the same basketweave pattern for consistency. Antique brass rivets, a buckle, and quick-release clasps were used to make the strap removable.
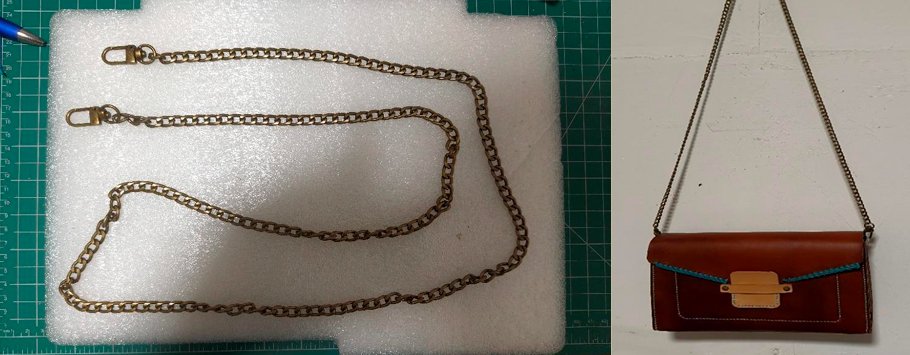
Where the buckle is attached, I hand-stitched it for maximum strength and to reduce deformation over time. This ensures the strap is built not just for style, but for long-term durability. The bag also includes an interchangeable chain strap for added versatility.
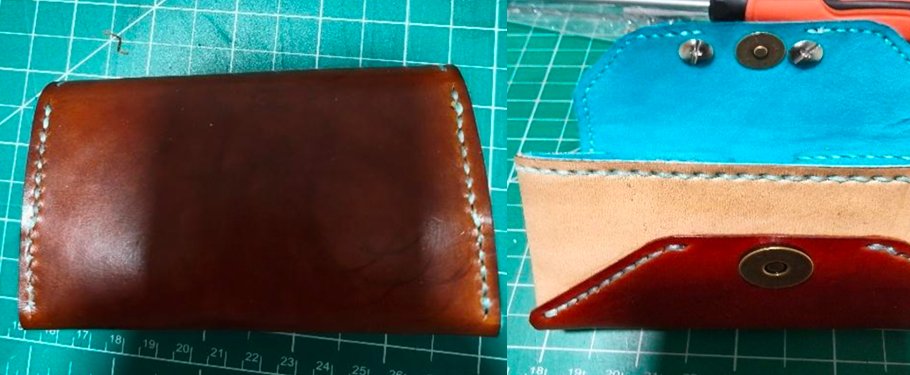
Step #12 Final Touch – A Personal Thank You
To accompany the bag, I made a matching card case as a complementary piece due to the size of the order. It serves as a small thank-you gesture, adding a final personal touch to the overall handmade leather bag.
Conclusion
This custom-made leather bag reflects a complete process built on careful planning, detailed craftsmanship, and personal input at every stage. Each step contributes to a product designed for both durability and individuality, from working with full-grain leather to the final hand-stitched details.
What sets this apart is not just how the bag looks, but how it is made thoughtfully, patiently, and tailored to the person it was created for.